2021. 10. 19. 21:00ㆍjsp
JSTL 등장과 사용이유
JSP는 <jsp:include>같은 태그를 개발자가 추가 할 수 있는 기능을 제공하는데
이를 커스텀태그라고한다.
이런 커스텀 태그중 많이 사용되는 것들을 모아서
JSTL(JSP Standard Tag Library)라는 표준을 만들었다.
이 JSTL을 사용하면 좀 더 편리하게 JSP를 작성할 수 있을 것이다.
먼저 다음과 같은 경우를 살펴보자.
https://brilliantdevelop.tistory.com/49 에서 prodList의 경우
for문과 html태그가 섞여있어 가독성이 떨어진다.
<%
	for(int i=0; i<productList.size(); i++){
			if(i%3==0){
				out.print("<tr>");
			}

 %>
					<td>
						<ul>
							<li class="prod-image"><a href="prodView.jsp?prodId=<%=productList.get(i).getProdId()%>"> <img alt="" src="<%=request.getContextPath()%><%=productList.get(i).getProdImg()%>"></a>
							<li class="prod-title"><a href="prodView.jsp?prodId=<%=productList.get(i).getProdId()%>"> <%=productList.get(i).getProdName()%></a>
							<li class="prod-price"><%=productList.get(i).getProdPrice()%>
							<li class="prod-reg-date"><%=productList.get(i).getProdRegDate()%>
						</ul>
					</td>

	<%
    if(i%3==2){
	  out.print("</tr>");
				}
		}
%>
for문이 끝나고 나면 몇 줄 안되는 코드때문에 <% %>를 사용해야한다.
단순히 '}'를 위해 <%%>를 사용하는게 불편해보인다.
그런데 위의 조건이나 반복문같은 걸 아래와 같이 html 태그처럼 사용할 수 있으면 어떨까?
<if boolean="true or false">트루일때만 출력되는 html 내용 </if>
좀 더 개발하기도 쉽고 가독성도 좋은 코드가 될 것이다.
이러한 기능들을 모아놓은게 바로 JSTL(JSP Standard Tag Library)이다.
라이브러리이니까 라이브러리를 다운받도록 하자.
https://mvnrepository.com/ 에서 jstl을 검색해서 javax.servlet->jstl의 1.2 버전을 다운 받도록하자.
(javax.servlet.jsp.jstl가 아니다. )
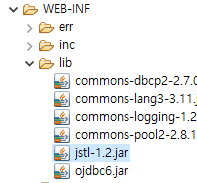
jar파일을 다운받고 WEB-INF의 lib폴더에 압축을 풀지말고 넣어주자.
jsp에서 jstl라이브러리를 사용하기 위해선 페이지디렉티브 taglib를 선언해야된다.
<%@taglib prefix="c" uri="http://java.sun.com/jsp/jstl/core" %>먼저 uri는 해당 jstl 종류를 말한다. jsp/jstl/core를 사용하면 해당 기능들을 사용 할 수 있다.
사용의 시작은 prefix에 선언된 'c'로 <c:태그종류> 와 같이 사용한다.
이 때 prefix에 값은 내 맘대로 써도 되지만 보통 uri의 값에 맞게 선언한다.
(core는 c, fmt는 fmt 등)
JSTL 태그 종류
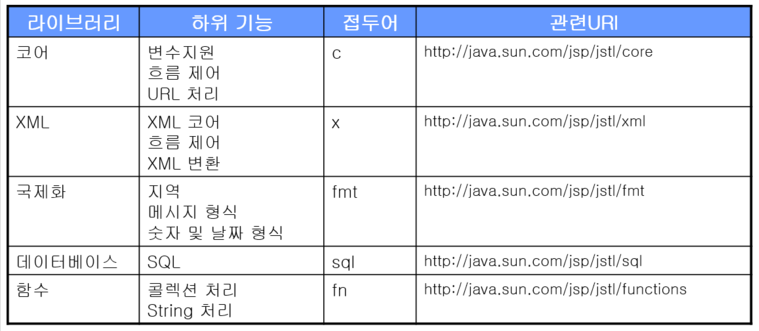
근데 코어태그를 제외하면 다른 태그는 굳이 사용할 일이 많지 않다.
코어태그

<c:set>
<c:set>태그는 EL 변수의 값이나 EL 변수의 프로퍼티 값을 지정할 때 사용된다.
<c:set>태그를 선언한 뒤로는 EL로 사용이 가능하다.
사용방법은 EL변수 생성, 객체 프로퍼티 값 설정 2가지가 있다.
01jstlSet.jsp
<%@page import="com.study.member.vo.MemberVO"%>
<%@page import="com.study.common.util.UserList"%>
<%@page import="com.study.login.vo.UserVO"%>
<%@ page language="java" contentType="text/html; charset=UTF-8"
    pageEncoding="UTF-8"%>
<%@taglib prefix="c"  uri="http://java.sun.com/jsp/jstl/core" %>

<%
	request.setCharacterEncoding("UTF-8");
%>
<!DOCTYPE html>
<html>
<head>
<%@include file="/WEB-INF/inc/header.jsp" %>
<title></title>
</head>
<body>
<%@include file="/WEB-INF/inc/top.jsp" %>

<%
 	UserVO user=new UserVO("han","한창희","1004","관리자");
%>
<c:set var="user" value="<%=user %>" scope="request"></c:set>
${user }
<br>
<c:set target="${user }" property="userName" value="짜장신짜오"></c:set>
${user }

</body>
</html>
이 때 주의할 점은 target에는 EL변수나 <%=user%>로 설정해야된다는 것이다.
그냥 "user"만 쓸 경우 String "user"로 인식해
String에 userName속성이 없으므로 에러를 일으킨다.
<c:조건문>
<c:if>태그를 써보자. 자바의 if와 큰 차이점은 없다.
또 <c:choose> <c:when> <c:otherwise>는
각각 자바의 switch, case, default와 대응된다.
또 <c:if>는 else가 없기 때문에 else조건에 해당하는 부분을
또 <c:if>태그를 써서 작성해야된다.
<c:if test="true or false"></c:if>
test속성에는 true나 false 값만 올 수 있다.
<%= %> , EL의 값이 true false여야한다.
<c:if test="<%=5>3 %>"></c:if>
<c:if test="${5>3 }"></c:if>
<%=%>나 EL 모두 true를 반환해서
<c:if test="true"></c:if>와 같이 작성한 것과 같다.
그렇기 때문에 다음과 같은 경우가 되지않도록 공백에 주의한다.
<c:if test="<%=5>3 %> "></c:if>     test="true "
<c:if test=" ${5>3 }"></c:if>       test=" true"
그럼<c:if> 예제를 작성해보자
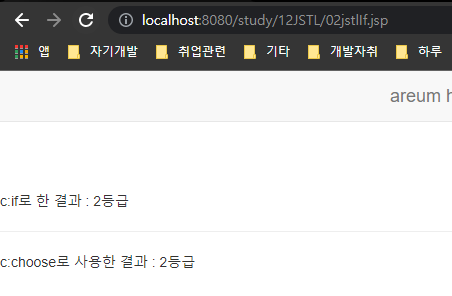
02input.jsp+ 02jstlIf.jsp
02input.jsp에서 입력받은 값에 따라 성적을 출력해주는 예시이다
02input.jsp
<%@ page language="java" contentType="text/html; charset=UTF-8"
    pageEncoding="UTF-8"%>
<%@taglib prefix="c" uri="http://java.sun.com/jsp/jstl/core" %>     <!-- 인터넷에서 CDN방식이 아닌 단순 구분자, CDN방식일거면 라이브러리 다운 받았을 이유가... -->

<%
	request.setCharacterEncoding("UTF-8");
%>
<!DOCTYPE html>
<html>
<head>
<%@include file="/WEB-INF/inc/header.jsp" %>
<title></title>
</head>
<body>
<%@include file="/WEB-INF/inc/top.jsp" %>
<form action="02jstlIf.jsp" method="post">
	내 점수 : <input type="number" value="" name="score">
	<input type="submit">
</form>
</body>
</html>
02jstlIf.jsp
<%@ page language="java" contentType="text/html; charset=UTF-8" pageEncoding="UTF-8"%>
<%@taglib prefix="c" uri="http://java.sun.com/jsp/jstl/core"%>
<%
	request.setCharacterEncoding("UTF-8");
%>
<!DOCTYPE html>
<html>
<head>
<%@include file="/WEB-INF/inc/header.jsp"%>
</head>
<body>
	<%@include file="/WEB-INF/inc/top.jsp"%>
		<%
			int score = Integer.parseInt(request.getParameter("score"));
		%>
		c:if로 한 결과  :
		<c:if test='<%=score == 100%>'>만점</c:if>
		<c:if test='<%=score >= 90 && score < 100%>'>2등급</c:if>
		<c:if test='<%=score >= 80 && score < 90%>'>3등급</c:if>
		<c:if test='<%=score < 80%>'>노오오력</c:if>

		<hr>
		c:choose로 사용한 결과 :
		<c:choose>
			<c:when test="<%=score == 100%>">만점</c:when>
			<c:when test="<%=score >= 90 && score < 100%>">2등급</c:when>
			<c:when test="<%=score >= 80 && score < 90%>">3등급</c:when>
			<c:otherwise>
			노오오력
			</c:otherwise>
		</c:choose>
</body>
</html>
<c:반복문> begin end
core태그에서는 for문처럼 반복문도 지원해준다.
<c:forEach var="i" begin="1" end="10">이 때 var의 선언된 문자열은 <c:forEach>태그 안에서 EL로 사용가능하다.
03jstlFor.jsp
<%@page import="java.util.Map"%>
<%@page import="com.study.common.util.UserList"%>
<%@page import="com.study.login.vo.UserVO"%>
<%@ page language="java" contentType="text/html; charset=UTF-8"
    pageEncoding="UTF-8"%>
    <%@taglib prefix="c" uri="http://java.sun.com/jsp/jstl/core" %>
<%
	request.setCharacterEncoding("UTF-8");
%>
<!DOCTYPE html>
<html>
<head>
<%@include file="/WEB-INF/inc/header.jsp" %>
<title></title>
</head>
<body>
<%@include file="/WEB-INF/inc/top.jsp" %>
<c:forEach var="i" begin="1" end="10">
	i는 반복자 변수  ${i }  <br>
</c:forEach>

</body>
</html>
i는 그대로 i로 출력되지만 ${i}는 반복문이 진행됨에 따라 값이 변하는걸 확인할 수 있다.
자, 위에서 forEach를 사용해봤다. forEach태그에는 다음과 같은 속성이 있다.
| 속성 | 설명 |
| begin | 시작index |
| end | 종료 index |
| step | 반복시 이동 index |
| var | 반복문 안에서 EL로 사용할 변수이름. (begin,end)의 index값 또는 items의 내용물을 반복문안에서 EL로 사용가능하다. |
| varStatus | 반복문 루프 정보를 담는 객체. 반복문 안에서 EL로 사용할 수 있다. |
| items | Collection, 배열 등. 해당 객체만큼 반복한다. |
여기서 varStatus는 루프 정보를 담는 객체로서 여러 속성이 있다.
| 속성 | 설명 |
| index | 루프 실행에서 현재 index |
| count | 실제 루프 실행 횟수 |
| first | 현재 첫 번째 실행인 경우 true, 나머진 false |
| last | 현재 마지막 실행인 경우 true, 나머진 false |
| begin | begin 속성 값 |
| end | end 속성 값 |
| step | step 속성 값 |
| current | 컬렉션 중 현재 루프에서 사용하고 있는 객체 |
varStatus가 어떤식으로 사용되는지 알아보자.
<c:forEach begin="1" end="5" var="i" varStatus="st">
	변수 i : ${i } <br>
	varStatus의 count  : ${st.count }<br>
</c:forEach>
다음과 같이 반복문안에서 EL로 사용하고 EL의 프로퍼티 접근하듯이 사용한다.
${st.count} 뿐만아니라 ${st.index},${st.begin} 등으로 사용하면 될 것이다.
다음 예제를 통해 varStatus의 각 속성들이 무슨역할을 하는지 알아보자.
04jstlForVarStatus.jsp
<%@ page language="java" contentType="text/html; charset=UTF-8"
    pageEncoding="UTF-8"%>
    <%@taglib prefix="c" uri="http://java.sun.com/jsp/jstl/core" %>
<%
	request.setCharacterEncoding("UTF-8");
%>
<!DOCTYPE html>
<html>
<head>
<%@include file="/WEB-INF/inc/header.jsp" %>
<title></title>
</head>
<body>
<%@include file="/WEB-INF/inc/top.jsp" %>


<c:forEach var="i" begin="2" end="10" step="2" varStatus="status">   <!-- status는 varStatus의 이름  -->
	i값 : ${i }  <br>
	index : ${status.index } <br>
	count : ${status.count } <br>
	end : ${status.end } <br>
	begin : ${status.begin  } <br>
	<c:if test="${status.first }">처음일 때만 출력 <br></c:if>
	<c:if test="${status.last }">마지막일 때만 출력 <br></c:if>
	<hr>
</c:forEach>


</body>
</html>
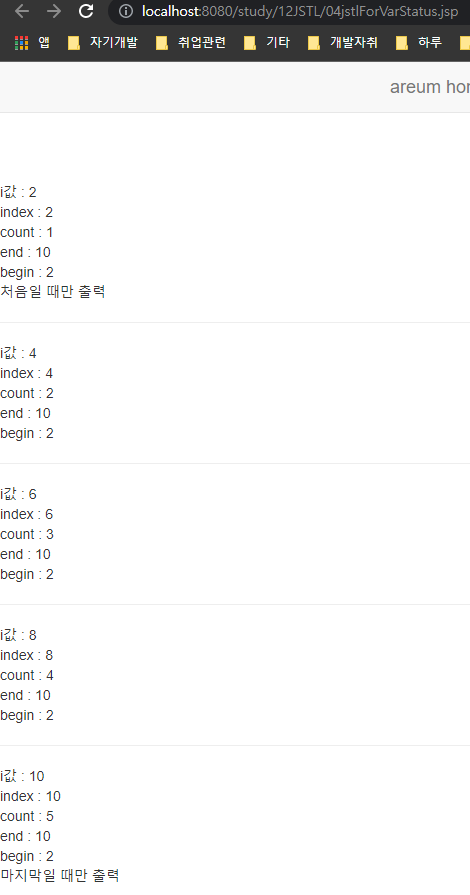
varStatus가 어떻게 작동하는지 쉽게 이해가 갈 것이다.
반복문을 이용한 예제
forEach문을 이용해서
구구단,별그리기를 해보자.
05jstl99.jsp 실행결과

05jstlStar.jsp 실행결과

<c:반복문> 배열 콜렉션
forEach태그의 items에는 배열, 콜렉션 객체가 들어가 원소 수만큼 반복이 가능하다.
물론 items를 돌리는 동안에도 varStatus는 사용이 가능하다.
06jsttlForArray.jsp
<%@ page language="java" contentType="text/html; charset=UTF-8"
    pageEncoding="UTF-8"%>
    <%@taglib prefix="c" uri="http://java.sun.com/jsp/jstl/core" %>
<%
	request.setCharacterEncoding("UTF-8");
%>
<!DOCTYPE html>
<html>
<head>
<%@include file="/WEB-INF/inc/header.jsp" %>
<title></title>
</head>
<body>
<%@include file="/WEB-INF/inc/top.jsp" %>
<%
	String[] vacation={"한석규","심이안","김소민","송인범","이윤행"};
	request.setAttribute("vacation", vacation);

%>
<c:forEach items="${vacation }" var="name">
	${name }
	<br>
</c:forEach>


</body>
</html>
07jstlForList.jsp
<%@page import="com.study.common.util.UserList"%>
<%@page import="com.study.login.vo.UserVO"%>
<%@ page language="java" contentType="text/html; charset=UTF-8"
    pageEncoding="UTF-8"%>
    <%@taglib prefix="c" uri="http://java.sun.com/jsp/jstl/core" %>
<%
	request.setCharacterEncoding("UTF-8");
%>
<!DOCTYPE html>
<html>
<head>
<%@include file="/WEB-INF/inc/header.jsp" %>
<title></title>
</head>
<body>
<%@include file="/WEB-INF/inc/top.jsp" %>
<%
	List<UserVO> userList=new UserList().getUserList();
	request.setAttribute("userList", userList);
%>
<c:forEach items="${userList }" var="user" varStatus="status">
	userId   :${user.userId }     <br>
	userPass : ${user.userPass } <br>
	userName : ${user.userName } <br>
	<hr>
</c:forEach>

</body>
</html>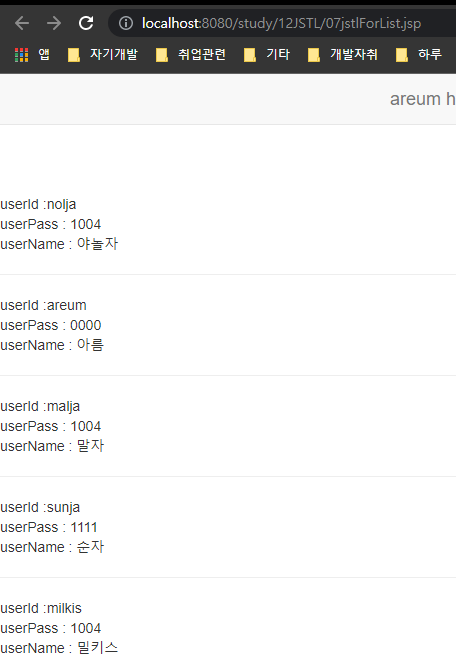
08jstlForMap.jsp
Map의 경우 java for문의 entrySet처럼 작동한다.
<%@page import="com.study.login.vo.UserVO"%>
<%@page import="java.util.Map"%>
<%@page import="com.study.common.util.UserList"%>
<%@ page language="java" contentType="text/html; charset=UTF-8"
    pageEncoding="UTF-8"%>
    <%@taglib prefix="c" uri="http://java.sun.com/jsp/jstl/core" %>
<%
	request.setCharacterEncoding("UTF-8");
%>
<!DOCTYPE html>
<html>
<head>
<%@include file="/WEB-INF/inc/header.jsp" %>
<title></title>
</head>
<body>
<%@include file="/WEB-INF/inc/top.jsp" %>
<%
	Map<String,UserVO> userMap=new UserList().getUsersMap();
	for(Map.Entry<String,UserVO> entry : userMap.entrySet()){
		out.print(entry.getKey()+ ": "+entry.getValue().getUserName());
	}
	request.setAttribute("userMap", userMap);
%>
<hr>
<c:forEach items="${userMap }" var="entry">
	${entry.key } : ${entry.value.userName }
</c:forEach>


</body>
</html>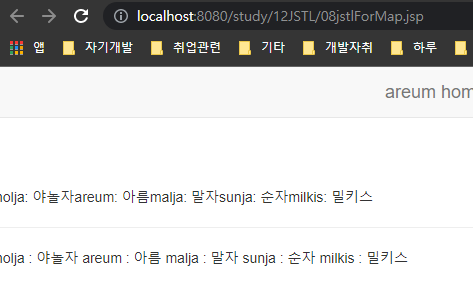
EL컬렌션을 이용해 ProdList 만들기
https://drive.google.com/drive/folders/1uHumdQakO7YC89ZfQeIyGcoGufJGvhdj?hl=ko의
jsp기초 - jstl 다운받자.
prodList.jsp와 prodView.jsp를 EL과 JSP를 이용해 만들어보자.